ADVERTISEMENT
🍌 Day-by-Day Breakdown:
🟡 Day 1–2:
All bananas looked normal. No visible change. The vacuum-sealed ones looked a bit more “compressed,” but otherwise fine.
🟠 Day 3–4:
-
Room temp bananas: Starting to develop brown spots
-
Refrigerated bananas: Skin darkening, but still firm inside
-
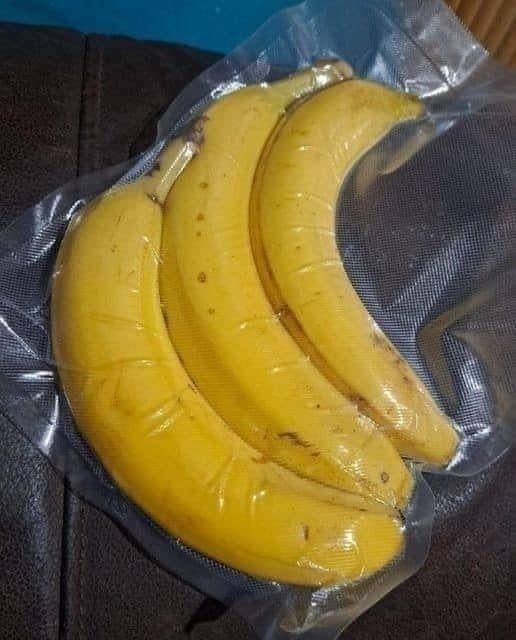
Vacuum-sealed bananas: No change — still bright yellow, no blemishes!
🔴 Day 5–7:
-
Room temp: Mushy, overripe smell, ready for banana bread
-
Fridge: Flesh slightly soft, skin turning black
-
Vacuum-sealed: Still fresh! Slight softening inside, but skin remained more intact and no sour odor
💡 The Results:
Vacuum sealing significantly slowed the ripening process! By limiting oxygen exposure and moisture loss, the bananas stayed firmer and more visually appealing for longer.
Plus, there was less odor and no sticky residue. The vacuum-sealed batch held out 2–3 days longer than the rest.
🛠️ Takeaway Tips:
-
Seal them early: Do it when bananas are at peak yellow — not green or overripe.
-
Refrigerate after sealing for best results.
-
Use for smoothies, baking, or meal prep — just slice and freeze sealed bananas for later use.
🤯 Unexpected Bonus:
Even after slicing, vacuum-sealed bananas stayed whiter and firmer in the fridge compared to uncovered ones. Game changer for smoothie bags!
🌿 Final Thoughts:
If you’re tired of tossing out overripe bananas, this quirky experiment might just save your breakfast game. With a simple vacuum sealer, you can extend shelf life, reduce food waste, and always have perfect bananas on hand. 🍌✨
Give it a try and let your inner kitchen scientist have some fun!
ADVERTISEMENT