ADVERTISEMENT
Step 5 (Optional): Maintenance Check
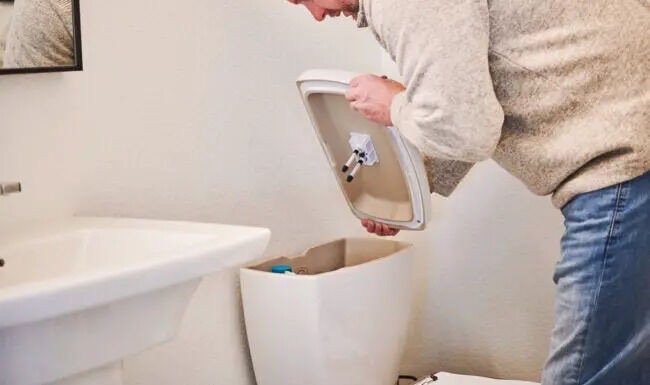
As you remove the tank lid, consider whether your toilet needs maintenance. Replace any parts that are not functioning optimally. If everything is working well, proceed to the next step.
Step 6: Clean All Tank Parts
Dilute your disinfectant cleaner by spraying it onto a sponge soaked in clean, warm water. Wipe down the ball float, flapper, and other tank components with the diluted disinfectant. Rinse and re-soak the sponge if needed.
Step 7: Refill and Test
Turn on the water valve to allow the tank to fill, then flush the toilet once or twice. If the tank looks clean, you’re done. If not, repeat Steps 3 through 6. Once satisfied, turn on the faucet, let the tank refill, and you’re good to go!
Maintaining a Clean Toilet Tank:
To prevent future issues and simplify your cleaning routine, here are some tips:
Consider using tank tablets to minimize mold, mineral, and contaminant buildup. Avoid those with bleach, as it can corrode metal parts.
If you prefer not to use tablets, periodically empty the tank and fill it with vinegar overnight to dissolve mineral deposits and kill mold and mildew.
Assess your tank’s condition every couple of weeks to determine your cleaning schedule. Keep a calendar to track inspections and cleanings.
Conclusion:
Regularly cleaning your toilet tank is a simple yet essential task that can extend the life of your toilet, maintain a fresh bathroom environment, and save you time and effort in the long run. By following these steps and adopting some maintenance strategies, you can ensure that your toilet remains in tip-top condition. So, don’t wait – give your toilet tank the attention it deserves for a cleaner and healthier bathroom.
ADVERTISEMENT